


This training tip has been shared by Stacey Campbell, a dog trainer in San Francisco, CA, who owns and operates Go Fetch Dog Training. Stacey is also known as the human component of an agility team with her mixed-breed rescue dog, NAC MACH2 Roo! Stacey and Roo! are one of the most accomplished teams in the country, having won the AKC Agility Invitational, the AKC National Agility Championship, the Westminster Kennel Club Master Agility Championship, and having represented the United States on a world team.
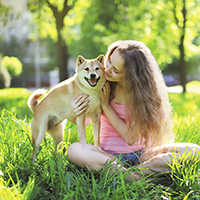
Muzzle targeting is the most used tool in my training toolbox. It taught my young, reactive, worry wart of a dog that my hand near her muzzle means she should focus on me. It gives her an alternative behavior to perform (instead of staring, barking, pulling on leash) while building in a positive association of my hand around her muzzle. Muzzle targeting has helped me navigate through a sea of handlers to the start line gate at an agility trial; it allows me to remain connected with my dog while an obedience judge chats with me before our performance or just waiting at the street corner in my neighborhood. Anytime I find myself in a jam, I just present my hand.
Part I: Building a positive response
- Stand to the side of your dog. I started with my dog along my left side but it doesn’t matter. You can eventually train both.
- Present your left hand along the left side of your dog’s head. Mark with a yes (or click) and feed a yummy treat to your dog with your right hand while your left remains in place.
- Once your dog feels comfortable with your hand present, have your left hand touch the left side of your dog’s muzzle. Mark the touch and reward with your right hand while your left remains in place.


Part II: Building Duration
- Stay on the right of your dog. Lightly cup your dog’s muzzle with your left hand for one second. Mark your hand cupping the muzzle immediately and reward from your right hand while your hand remains on his or her muzzle.
- Once your dog has mastered one second, gradually build the duration of your hold on the muzzle. Never increase the duration if your dog pulls away and always return to the previous step where your dog was successful if he failed 50 percent of the time.

Part III: Adding Movement
- Once you can hold your dog’s muzzle for 30 seconds in a stationary position, it’s time to add movement. Start with your dog sitting along your left side. Have your hand cup their muzzle, give your dog his cue to move with you (heel, let’s go, etc.) and take one step forward. Immediately reward your dog for moving with you while your hand remains on their muzzle.
- If you are successful three times, add two steps, then four, six, eight etc.
- For some dogs, working this step on leash may be easier and encourage them to move with you.

Part IV: Teaching the physical cue
- At this point, your dog should have a positive history of your hand being cupped around his or her muzzle so teaching the physical cue should be easy.
- Stand to the side of your dog, present your left hand cupped close to the side of your dog (not making any contact). Wait for your dog to move their head slightly in the direction of your hand. Mark and feed them for movement toward your left hand.
- If your dog is successful three times, present your cupped hand close to the left side of your dog. This time, you are going to wait for your dog to place his muzzle in your hand. Mark and reward with your hand in place.
***For smaller dogs, I train stationary muzzle targets while I am kneeling. For movement, you may train your dog to target your leg.
Canine Body Language- your dog is trying to tell you something
Dogs communicate their wants, needs, happiness and fear primarily through body language. Are you ready to learn what your dog is trying to tell you? Download this e-book to learn more.